My Motorcycle Power Outlet Had to Be Relocated
Doing a permanent motorcycle power outlet installation was part of the refitting of my Raider this summer.
I changed from the leather saddlebags to Tsukayu fiberglass and swapped out the chrome Yamaha backrest for the new powder coated steel version.
It seemed like reinstalling my 12 volt accessory outlet in a weather proof location seemed to make juuuuust a lil' sense.
I'd wired it in, temporarily, with it zip tied under the tail rack for my Alaska trip. While that worked it was far from an ideal setup. Weather wasn't much of a problem for simple plug-ins like the standard auto charger for phones and such... I could wrap them in a plastic bag... not great, but it worked.
... how-some-ever, having a small, pocket inverter hanging back there, plugged in and exposed to rain and such is pretty much a no go.
Now with the sealed up hard bags I've got the weather proof location to do the mount.
I actually got this done in two stages. I was about to leave on a week long tour so I hurried up and just initially reinstalled the same motorcycle power outlet I'd used on the Alaska trip with the wiring that I know worked well.
That got done the evening before I left on that trip, and as expected, it worked well to keep my phone and Ipod charged up.
I had a bit of an oops a while back with the small, pocket inverter I've used to charge my laptop. It fell out of the plug, tied onto the tailrack... at about 65mph. Hitting the road at that speed didn't leave much useful.
... anther reason to install this charging setup in an enclosed situation!
The small Acer Laptop I use on the road held enough power, and I did little enough blog posting on that trip that it held up with only a recharge the one night I used a motel.
... and one morning when I found a McDonald's with WiFi and an available wall socket to power the thing up. ;)
But, I did have the power to keep my commo and tunes running!
I initially spent a while scoping out where to mount the socket in the bag and where to drill the new hole to run the cable through; and then where and how to run the wires so that they'd be both protected from damage and be out of sight as much as possible.
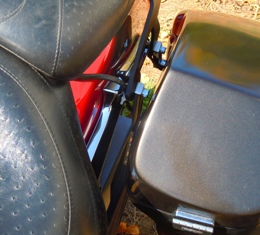
The location I settled on is in the front inboard corner of the left side saddlebag. That brings the wire out just behind and tight to the front steel saddlebag mount. (I sealed up around the cable where it penetrates the fiberglass with a good quality silicone sealant)
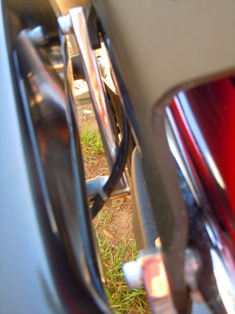
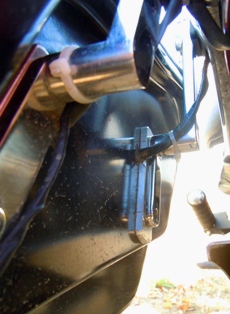
I ran the wire up the back of that mount and zip tied it in place. It runs in the open where it crosses the fender to dive under the pillion seat. While it can be seen there it isn't objectionable to me and does keep it down out of the way where getting snagged on something or damaged from road debris is unlikely.
I suppose I could wrap that section of the cable in red electrical tape and camouflage it... maybe some day when I'm feeling ambitious.

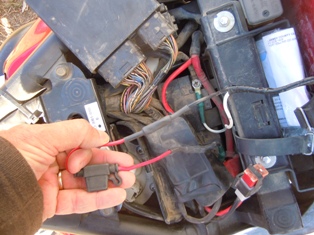
Then it was simply route it down to the battery and hard wire it on.
One thing to not forget about. A lot of electronics are polarity sensitive. Make sure you hook everything up negative ground (White wire). The Positive post will will be your power supply (black wire).
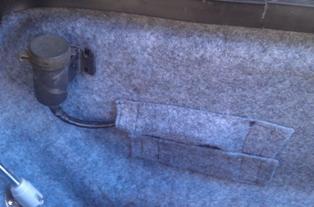
The plug itself is secured in the bag to the carpet lining with a heavy duty velcro. That allows me the flexibility to move it around if necessary for packing and such, and also eliminates the need to drill yet more holes in my saddlebags to mount it.
The thing I'd failed to do with the Alaska Installation was wire a fuse box into the line. That was something I really wanted to correct with this permanent 12 volt accessory outlet install; and was stage II of this install.
One of the first tasks I did when I rolled back into the rig after my last trip was to correct that fault of the accessory power cable setup I had originally installed.
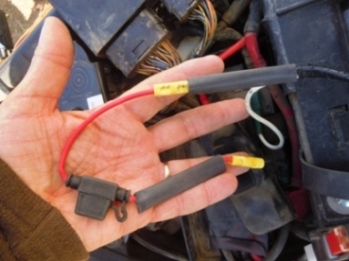
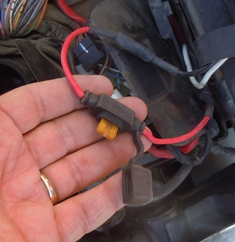
I spliced in a fuse box that would use the ATM type fuses.
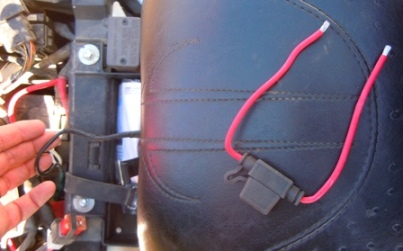
To make this a good weather tight connection I used simple butt splices and then protected those with heat shrink tubing.
With it all connected up I folded the new fuse box for the motorcycle power outlet into the factory wrap that protects all the wiring connections under the seat.
The only thing left was to test it out. So I plugged in my phone to check it for operation and oh yeah...
The newly wired up motorcycle power outlet... had NO POWER!
Huh? What the hell? I was just starting to pull things apart to check connections when one of those ~ DOH! ~ moments struck...
... I'd suggest actually inserting a fuse into the new fuse box before you button everything up. It'll provide a lot better performance that way! ;)
But, with the fuse in place...
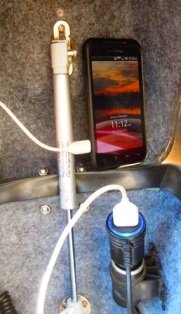
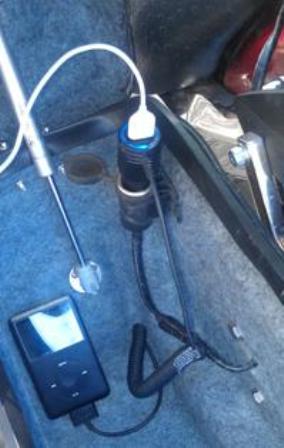
... The power was on! I've got that special little Ipod charger that has its own plug for the Ipod and a standard USB port on the back so I can plug my phone in and charge two at a time.
Power flow with pieces like that is a non issue. They each draw something like 500mA, so not enough to cause any trouble at all. I'm not sure what amperage a laptop charging pulls, but it's always done it on an inverter that only draws 140 watts, so I'm not concerned with that much either.
I've got a 5 amp fuse protecting the motorcycle power outlet now, which seems like plenty. Considering the low draw of those small electronics it maybe even a little high for what I'm charging. The fuse box is rated to 25 amps so I can adjust to whatever I might need... and 25 amps is far more than I'll EVER put through it.
I hard wired it to the battery for a reason. I didn't want to have any chance of experiencing any unexpected and unwanted, "Unintended Consequences" from tapping into an Ignition wire and finding it was the WRONG wire the hard way.
If you really want your motorcycle power outlet to be ignition controlled there is a safe and relatively easy and inexpensive way. I'll likely do that too, once I catch up on some of my other work and projects.
You can install a solenoid that controls the motorcycle power plug circuit that is controlled by a light circuit. You can get the solenoid at NAPA or just about any good auto supply.
Take the properly sized solenoid for the amperage and find a place to mount it under the seat. The power wire will run from the battery to the solenoid and then to your motorcycle power outlet. The control wire from the solenoid you can tap into something like your license plate illumination lamp or a running light circuit. You just want to use a bulb that is always on.
The power draw of the control circuit is miniscule so it doesn't need any sort of high amperage supply.
When you turn the key on, that light is energized, which supplies power to the solenoid and it turns the power on to the motorcycle power outlet. Kill the ignition at a gas or lunch stop... and the solenoid automatically turns off the power, so your forgetful mind won't forget that you've got things plugged into that itty bitty motorcycle battery... and still drawing power! :)
It's a pretty simple, easy to do and almost critical accessory for long rides and motorcycle camping. No need to be bullied by it... Just do it... then...
... Grab your handles and ride!
Return from Motorcycle Power Outlet to Motorcycle Touring on Freedom Road


